Registering a Smart-ID account is easy, even if you are not an experienced ID-card user. These instructions will give you all the information you need to get started: please read through before you start the registration process and if required, we have provided additional information in links throughout this section.
Smart-ID accounts for minors will need to be authorised by a parent or guardian – we’ve got a separate set of helpful tips if you want to know how to use your ID-card to register Smart-ID for a child.
First of all, check that you have everything you need for Smart-ID registration:
- Have you downloaded and installed the Smart-iD app?
You can download your Smart-ID app for free through GooglePlay and AppStore. Just follow the instructions on your screen and you will be ready in a couple of minutes. - Do you have a valid ID-card?
Make sure that you have a valid ID-card and that you have your PIN code(s) available. - Is your card reader working?
Before you start the registration, make sure that your ID-card reader works and that your ID-card is inserted into the reader correctly. You can do that by logging in to your online bank account or any other e-service using the ID-card as your login method. If you get in, it means you are ready to set up Smart-ID!
Step 1: open the Smart-ID app on your smart device
Open the Smart-ID app (click on it) on your smart device and select “Register”. You will be asked to select your country of residence and authentication method (choose “ID-card”).
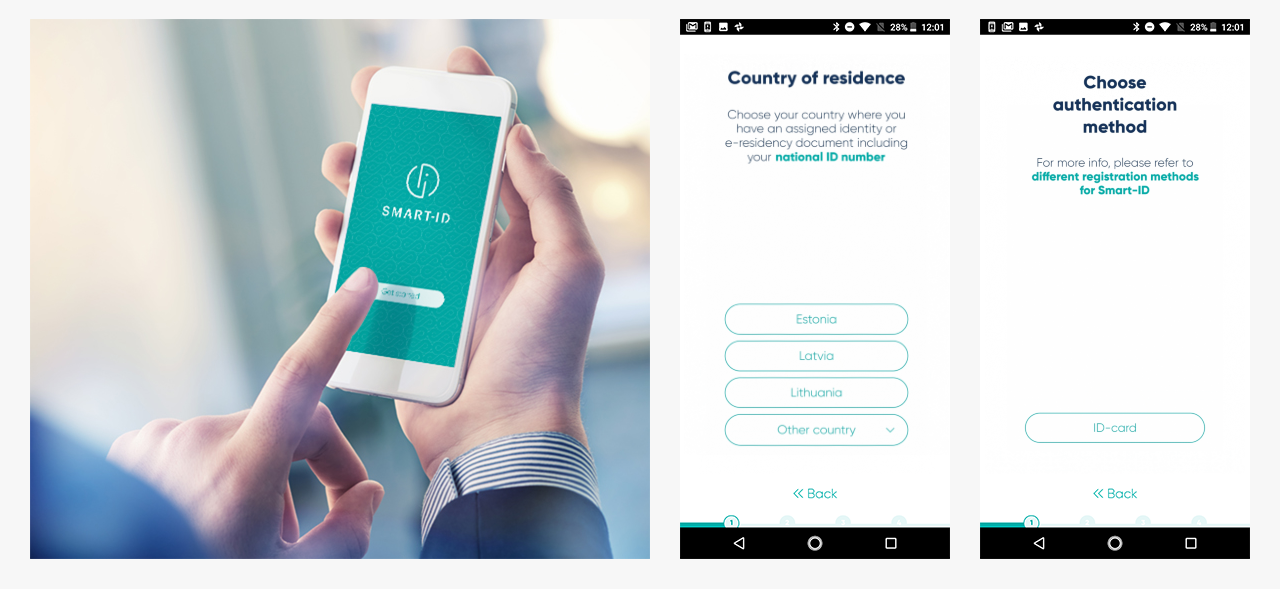
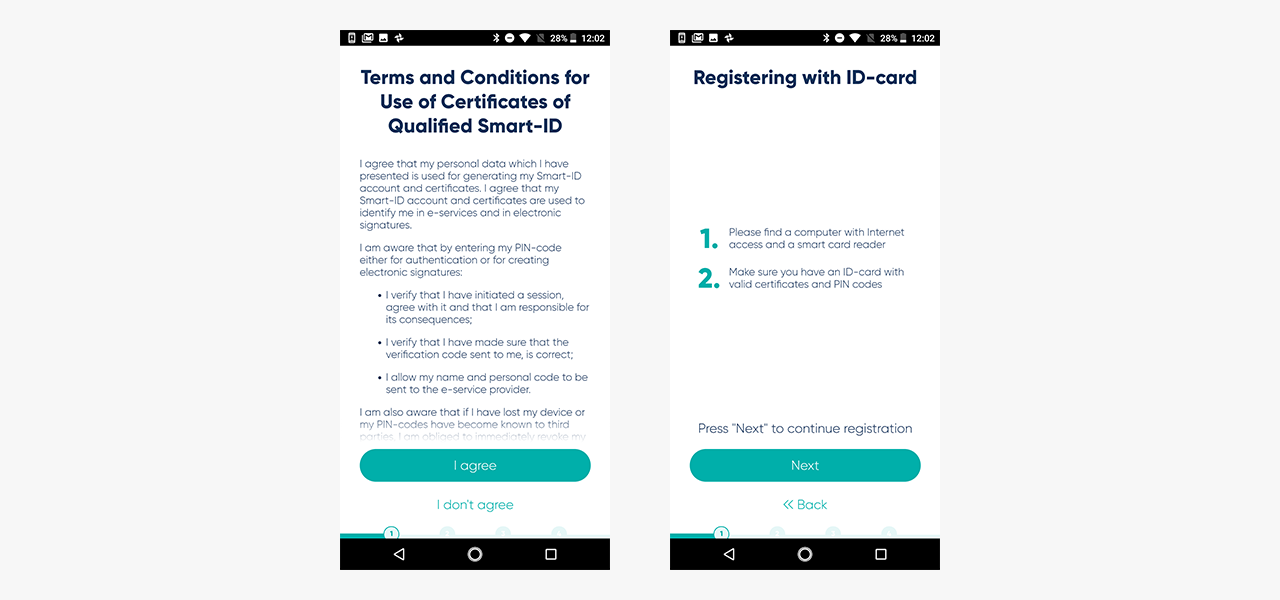
You’ll also have to read through and agree to the terms and conditions of using Qualified Smart-ID Certificates (confirming that you want to use Smart-ID for authentication).
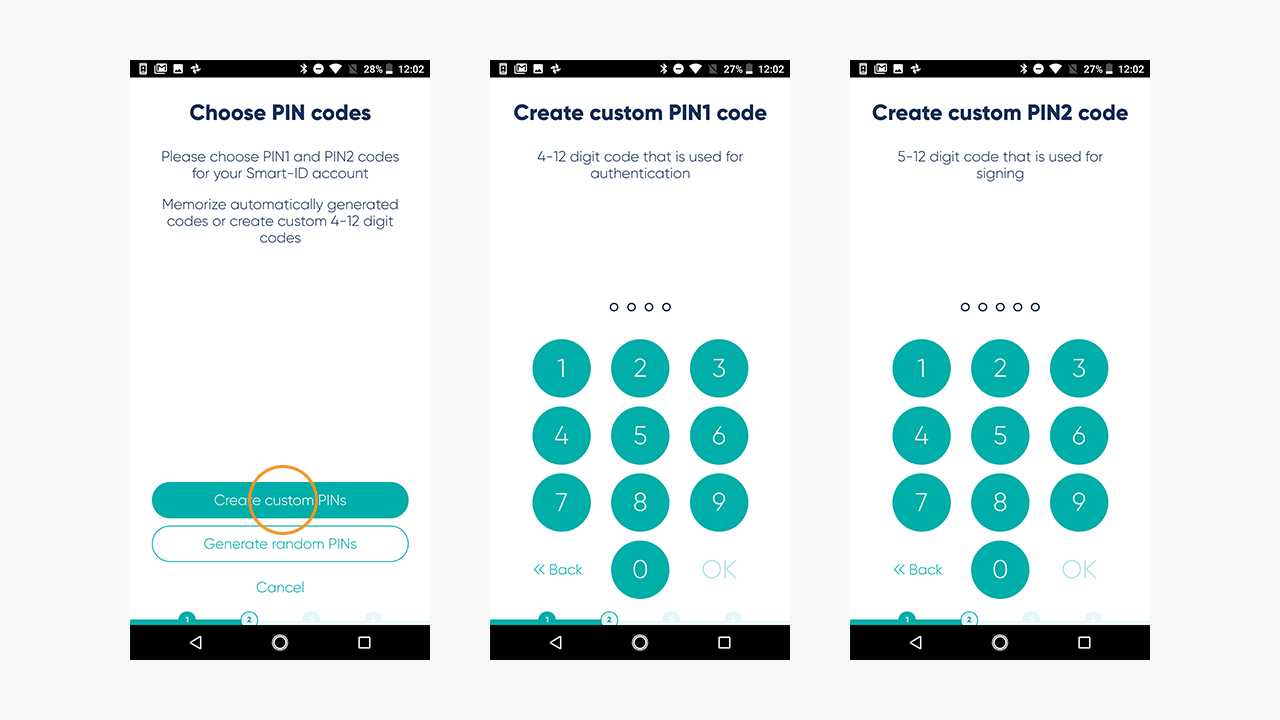
Step 2: choose your PIN-codes
Next you’ll be asked to choose the PIN-codes you want to use with your Smart-iD app. Please note, Smart-ID PIN-codes can’t be restored or reset, so it is important that you choose PIN codes that are easy for you to remember but are also difficult for others to guess. For more information on PIN codes, read our tips on PIN-codes.
Step 3: continue registration on your computer
After you’ve chosen you PIN-codes, the Smart-ID app on your smart device will ask you to continue the registration with your ID-card and that you will need to open an internet browser on your computer. Follow link provided in the app.
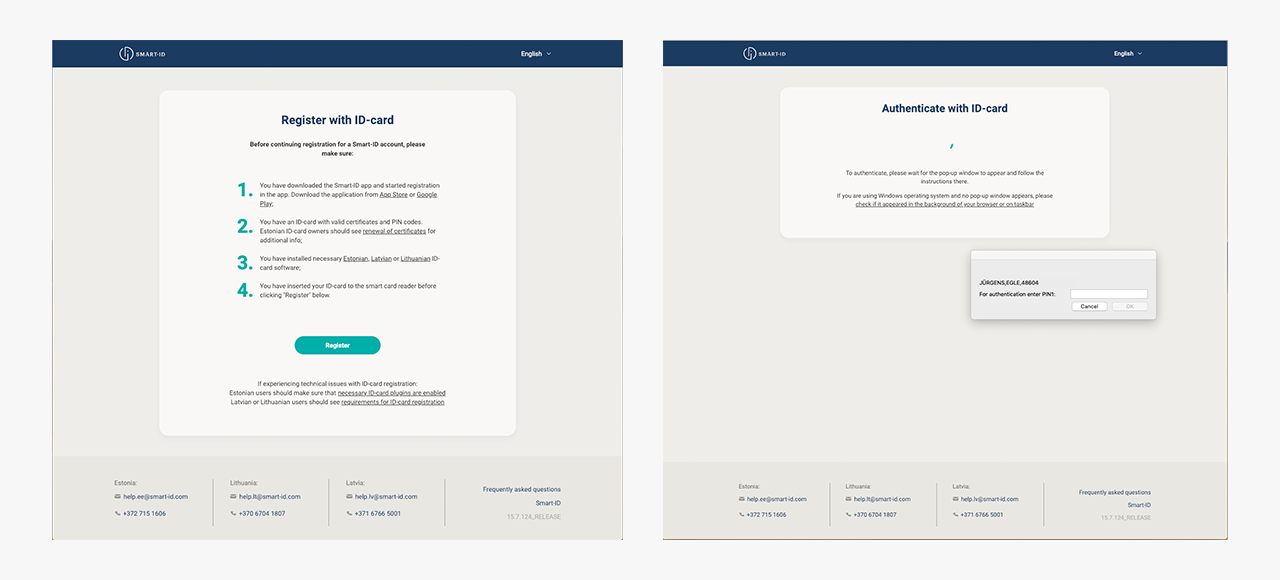
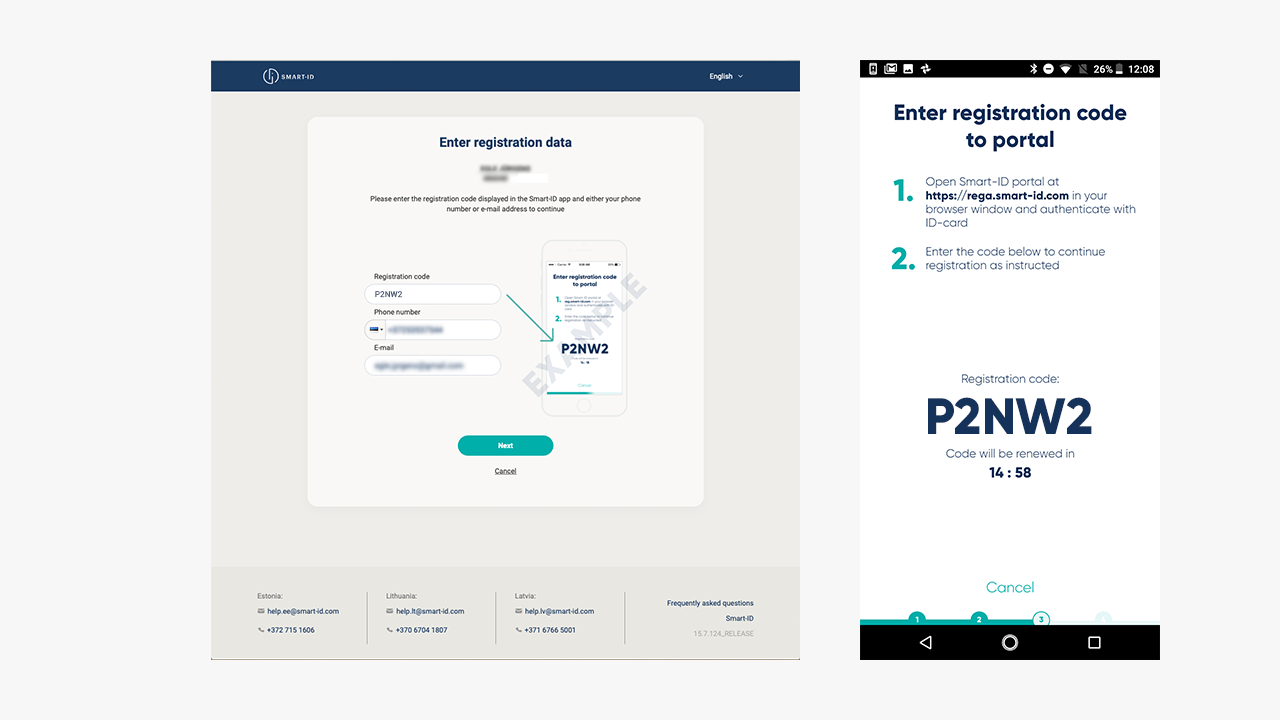
Step 4: fill in the details on your computer
The Smart-ID portal – the website you just logged in to – will ask you a few simple questions. Once those have been answered, you’ll be asked to enter your Smart-ID registration code. This is the code given to you by the Smart-ID app on your phone or tablet. This registration code is valid for 15 minutes: so if you are unable to complete the registration process in this time you will have to start again from the beginning.
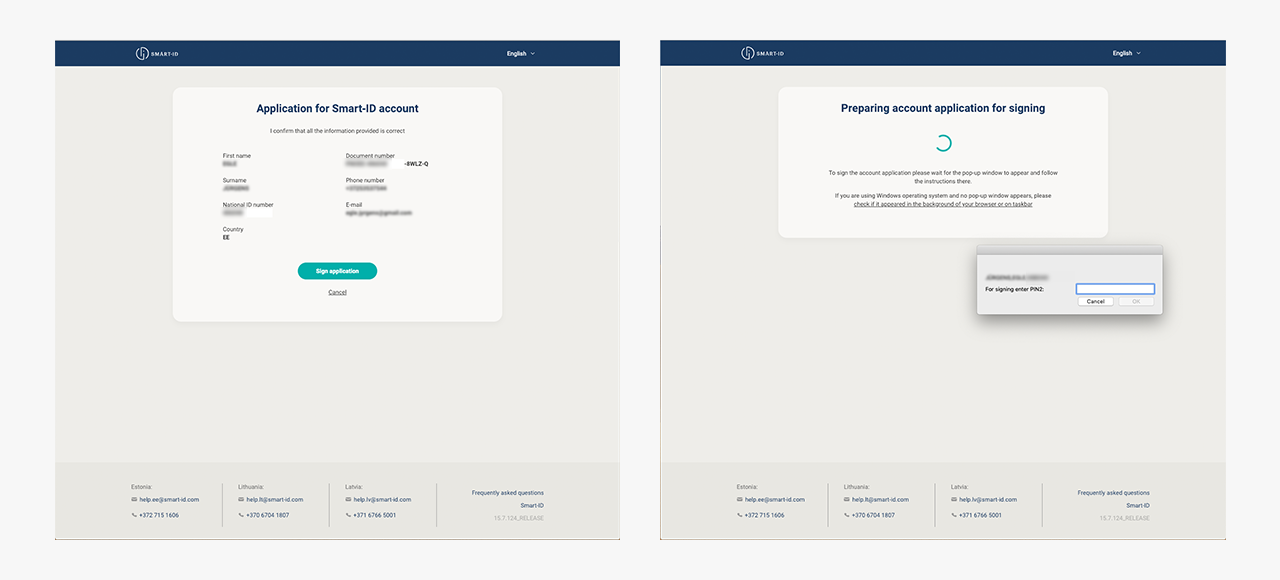
Step 5: confirm your Smart-ID account on your computer
If the registration code that you have on your Smart-ID app matches the one you entered on your computer, you’ll be automatically taken to the next step to confirm your registration. Follow the instructions on the screen and you’ll be fine! Remember that the PIN codes for your ID card may be different from the ones you chose for your Smart-ID: make sure you enter the correct ones when asked!
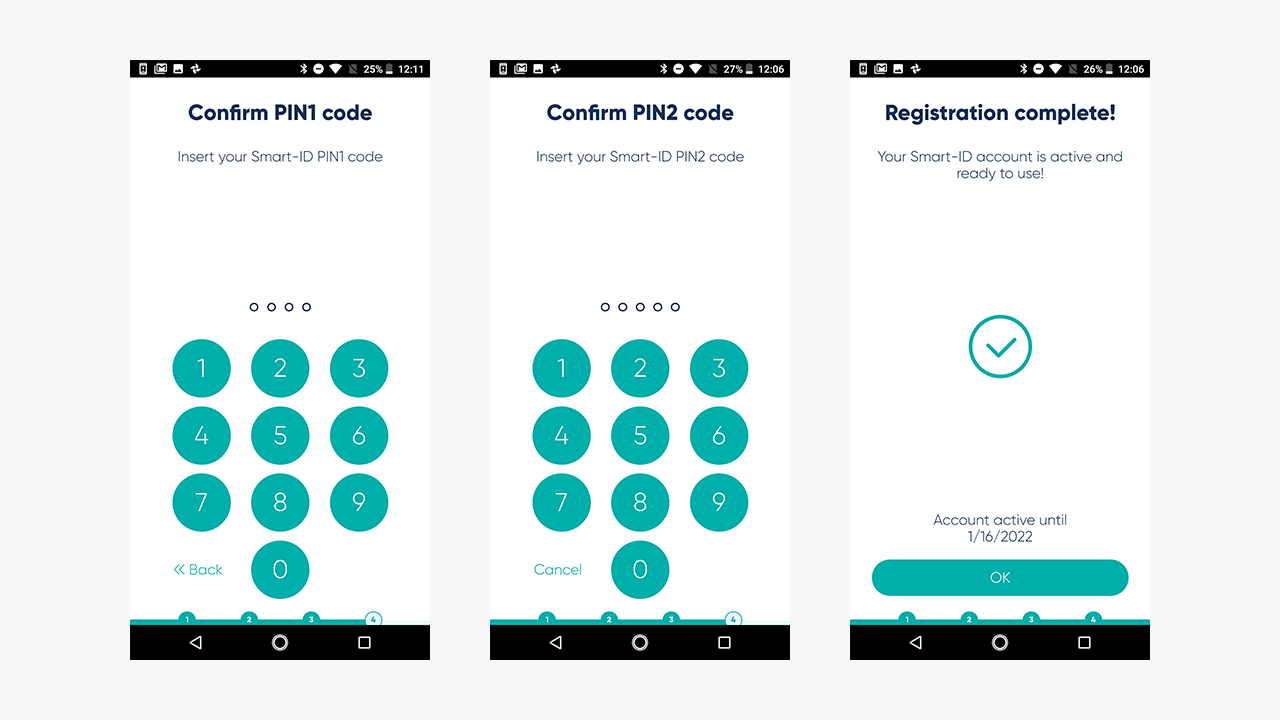
Step 6: finalize the registration process on your smart device
After you’ve confirmed your registration on your computer, you’ll see a notification telling you to continue on your smart device. At this point, you will no longer need to use your computer to continue the registration process.
The last step of Smart-ID registration is to confirm that you can recall your Smart-ID PIN 1 and PIN 2 codes. If the codes you are asked to enter at this stage match the ones you chose earlier, congratulations! You are ready to use Smart-ID!
Step 7: hurray, it’s time to enjoy!
Celebrate your new electronic freedom and log in to one of the e-services using your brand new Smart-ID account! You could, for example, log in to your online bank account. Just choose “Smart-ID” as your authentication method and enter your normal user name and/or national insurance number as required. The Smart-ID app on your smart device will let you know when you need to confirm your log in with PIN 1. Just follow the instructions on your screen, it’s really that easy! Don’t forget that you can use Smart-ID across multiple devices – i.e. you can use it to log in to services through your computer and once you’ve confirmed login/transaction on your Smart-ID app, the browser will automatically redirect you within a few seconds.
Just try it, it really will make your life so much easier!
Download easy-to-print instructions for registering Smart-ID account with an ID-card (pdf)
| Estonia | Latvia | Lithuania | |
|---|---|---|---|
| e-Identity: | |||
| ID-card | |||
| Mobile-ID | n/a | ||
| Bank offices: | |||
| SEB | |||
| Swedbank | |||
| Luminor | |||
| Biometric identification: | |||
| ID-card | |||
| Passport | |||
| Existing Smart-ID account | |||
| Smart-ID | ** | ** | ** |
| Estonia | Latvia | Lithuania | |
|---|---|---|---|
| Bank link: | |||
| Urbo Bank | n/a | n/a | |
| Bank offices: | |||
| SEB | n/a | n/a | |
| Swedbank | n/a | ||
| Urbo Bank | n/a | n/a | |
| Artea Bankas | n/a | n/a | |
| Existing Smart-ID account: | |||
| Smart-ID | n/a | n/a | n/a |
How to use the table:
V = Yes, this method is available
n/a = No, this option not available
* = Option available with some limitations
** = Option available with specific limitations, please read more about using your existing Smart-ID to authenticate a new account.
NB! Depending on the registration method, different age restrictions may apply for users younger than 18 years old. Please read more about the requirements for Smart-ID account for minors.
Terms of use, for example transfer limits etc., are set by e-service providers.
* Geographical restrictions might apply.